
To select a specific report, locate it among the list of available reports on the left side of the Reports screen, then click on it. The report name is then highlighted and the options for that report appear in the right-hand portion of the screen.
Many reports have various options that allow you to select what records to include in the report as well as for grouping and sorting information in the report. You set these options on the right side of the Reports screen before the report is generated.
Examples of common selection and sorting options are illustrated below. Options for some reports may vary slightly from those illustrated. Some reports have no options. Record selection and sorting for these reports are predefined, with no user options.

This option allows you to select a specific contact, family partner, property, work site, or fundraising activity (FRA). More than one selection field may be available for the report you select. The names available for selection and specific titles of the selection fields may vary depending on the context of the report.
For example, only contacts assigned to a Donor category may be available for selection in the context of donor reports; and only homeowners with active mortgages may be listed for some mortgage reports. Some reports require you to select a specific name, while others allow an option similar to <<All Contacts>> to include all names available.
Use the options that begin with <<All >> with caution. In some cases this may result in a report being generated and printed that is hundreds of pages long.

Many reports allow you to include multiple contacts based on the Category 1 and Category 2 to which they are assigned. Most Contacts reports will initially display the Category 1 drop-down list, with <<All Categories>> chosen. Selecting a specific Category 1 here limits inclusion in the report to only those contacts assigned to the specified Category 1; and adds to the display a Category 2 drop-down list where you can further narrow your selection of contacts as needed.
Other reports may implicitly define the Category 1 (for example, many donor reports assume that the Category 1 is Donors) but allow further selection based on Category 2. Only one distinct category of contacts may be included in the report results.
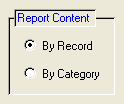
Several Contact Management reports have a Report Content pane that provides two options - By Record and By Category. If you select By Record, the names listed will be a combination of Person 1 and Person 2 names, if they exist. If you select By Category, the names listed will be the names that are defined as being the contact for the selected category.
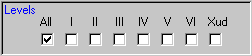
Selection by family partner level for family partner and family partner reports follows a slightly different method. The Levels option shown above allows inclusion of families in any combination of levels depending on whether all or only certain specific levels are checked.
Irrespective of the category selected, reports will often not include all contacts of the category selected. For example, some donor reports will show only those contacts in the selected donor category who have also made a donation; and Labels and Export Data reports will include only those contacts of the selected categories for whom a valid address is recorded.
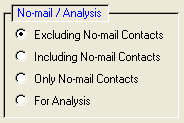
If you are exporting data, you can include or exclude contacts based on the status of the No Mailings check box in their record, contacts with bad addresses, and zzz History records.
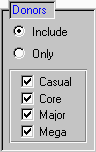
The Donors Class Filter is a filter option for several Contact Management reports on the Reports screen.
When the filter is set to its default as shown in the graphic above, all the contacts in the Category selected are included in the report data. This is essentially the same as the filter being turned off.
When Include is selected and some of the Donors classes are unchecked, all the contacts in the Category selected, except the contacts that belong to the unchecked Donors classes, will be included in the report data. For example, if the Donors/Individuals category and Include are selected, and then the Major donor class is unchecked (which essentially excludes it), all of the contacts in the Donors/Individuals category, except for those contacts in the Major donor class, will be included in the report data.
When Only is selected, then only the contacts in the Category selected who also belong to one of the Donors classes checked will be in the report data. For example, if the Donors/Individuals category and Only are selected, and then only the Major donor class is checked, then only contacts in the Donors/Individuals category who are also in the Major donor class are included in the report data.
A pair of volunteer reports allow you to select volunteers to include in the report based on their skills, interests, and availability as defined on the Skills/Interests tab of the Volunteer Information screen.
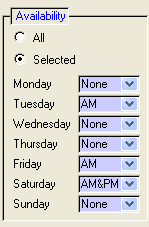
If All is selected under Availability, all volunteers will be included in the report without regard to the days they are available; or you may select individual days to include only volunteers available on those days in the report. For each day, you can select None, AM, PM, or AM&PM.
If you select more than one day, the report will include all volunteers available on any one of the days you select for the times you chose, not necessarily on all days selected.
In addition to setting the availability, you must also select categories from the Volunteer Skills/Interests column, together with a related attribute if the skill uses them. You may select multiple skill or interest/attribute profiles by checking the Inc. (Include) field next to each one you want to use with the report. The report will list those volunteers that are recorded for any of the skills or interests/attributes you select here.
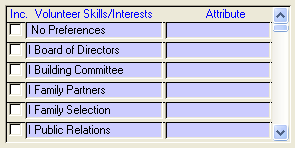
You must select something from the Interests/Skills field for these reports. You may use the comparable Contact report and select those in the Volunteers/General category if you want a more general listing of volunteers.
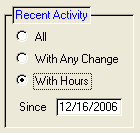
These reports also have the following option, which allows you to select only those volunteers with any change in their records since a certain date or With Hours (i.e., hours worked) since a specified date.
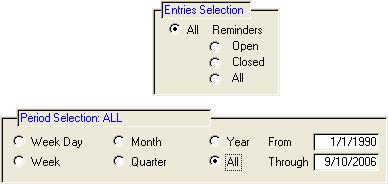
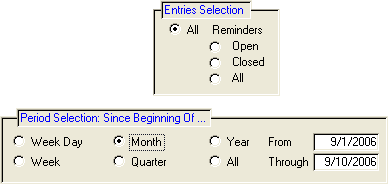
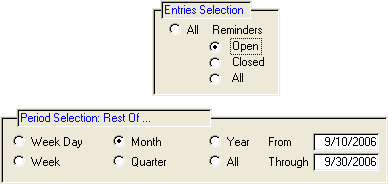
Many reports allow you to include only records (e.g., donations received, hours worked, payments made, etc.) during a specified time period. Although the layout and options may vary superficially between different reports, the example below illustrates the basic options.
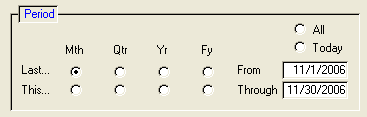
On Log reports, the meaning to the date range changes with different selections; and the label on the Period Selection pane is modified to reflect this change.
A small number of reports require a single date, such as the Balance As Of date for mortgage balances. The label on this selection may change depending on the report.

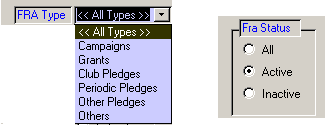
Many reports allow selection of records based on their status or type; for example, Active FRAs of type Grants.
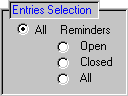
The Entries Selection setting for log reports includes two All radio buttons. The All radio button by itself on the left side of the pane includes in the report all logs and reminders whose Entry Date is within the range you set elsewhere in the Date or Period pane.
Selecting one of the radio buttons under Reminders on the right side of the Entries Selection pane changes the focus to the Reminder Date. As a result, only reminder entries for which a Reminder Date was set will be included in the report.
Selecting All under Reminders causes the report to show all reminders whose Reminder Date is within the range set in the Date or Period pane. Selecting Closed or Open further limits the report to showing only those reminders for which the Closed check box is or is not checked, respectively.
For more information, see the Recording Log Entries and Reminders section.
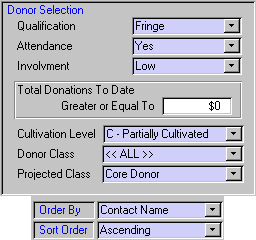
A pair of development reports allow you to select donors to include in the report based on a wide range of development classifications.
Any criteria you do not need for the report you are working on should be left as << ALL >>. You can choose the sort order from an extensive set of options in the drop-down lists at the bottom of the options list.
For more information on these classifications, see the Development tab section.
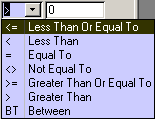
The comparison filter allows you to select only records that meet the criteria you choose for the value you enter in the field on the right.
Some donation and volunteer hour reports allow you to select records with amounts of a specified value, for example, to list donations greater than $1000 or volunteers who have worked more than 250 hours. When setting the specified value, remember that if you select > Greater Than, it will include only items whose value is strictly greater than the value set. Items equal or less than will be excluded.
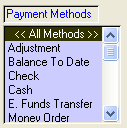
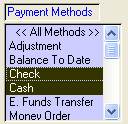
Some reports have lists that will allow you to select multiple options, such as the Payment Methods list shown below. When you select << All Methods >>, all payment methods will be included in the report. If you select one or more options, only records with any of the options you selected will appear in the report.
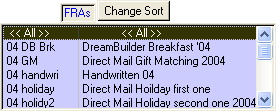
The FRAs Multi-Select Options has two columns that allow you to select either by abbreviation or description. There is a button that allows you to change the sort to be either by the first column (the FRA abbreviation), or the second column (the FRA’s description).
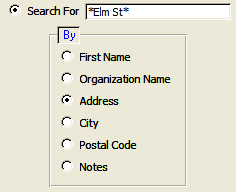
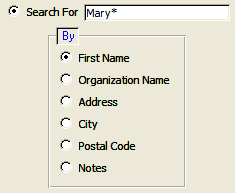
Some reports have Filter By options similar to the one shown below. When All is selected, the filter is not applied. When you select any of the other options, a text box appears to the right of Filter By where you can enter the text you want to filter by.
Only records that meet your specified filter definition will be included in the report. For more information, see the Filters section.
Generally, label count reports are done right after a labels report has been created. Therefore, the labels count reports use all of the option settings of the labels report that has just been run along with the following option.

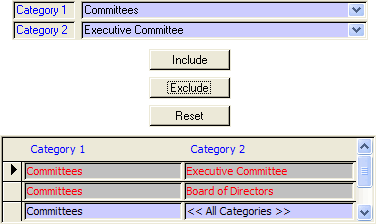
This report allows you to pick the categories you want to include or exclude from your report output. When you first select this report, the Category 1/Category 2 pane shown at the bottom is empty. As you make your category selections from the drop-down lists at the top, and click either the or button, your selections are added to the top of the lower pane and your previous selections are pushed down.
Categories to be included in the report are shown with black letters on a blue background. Categories to be excluded from the report are shown with red letters on a gray background.
In the example shown below, the first selection to be included is Committees/<<All Categories>>; the second selection to be excluded is Committees/Board of Directors; and the final selection to be excluded is the Committees/Executive Committee. The result is that the report will include all contacts with a Category 1 of Committees except for those whose Category 2 is either Board of Directors or Executive Committee.
If you make a selection and decide it is a mistake, you can select it in the lower pane and delete it. If you decide you want to start over, you can click the button and the lower pane will be cleared. Once you have made all of your selections, you can click or to generate your report.
If you select a category but forget to include or exclude it before you click , , or , Keystone assumes you wanted to include it and includes that category in the output.
An Exclude By option is also available. When you select Category, if a contact is in both a category you chose to be included in the report and one you chose to exclude, they will still appear in the output. If you select Contact, they will not.
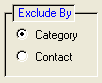
If you hover your mouse cursor over the Exclude By options, you will see additional information on how to use them.
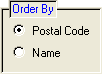
Many reports offer options for the order in which records will appear in the report. For example, the option of sorting by Postal Code or Name is offered for most label reports.
In addition to allowing you to pick what field your report should be sorted by, many reports also allow you to choose the sort order.
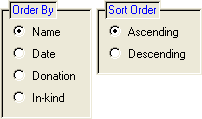
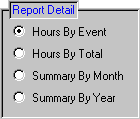
Many Detail/Summary reports allow several choices for showing all details (each payment or day worked) or only summaries by person or time periods. In the example above from a volunteer report, there are four options:
Other Detail/Summary reports have their own set of options based on what is most appropriate to the purpose of that particular report.

Most label reports may be produced either with or without the titles (Mr. & Mrs., Rev., etc) that may be recorded for your contacts. Selecting With will cause these titles to be included in the name line of address labels or exported as part of the Combined Names field. The table below shows how titles are combined with names when the combined name line is generated.
|
Title |
No Second Contact |
2 Contacts w/ same last name (ex: John (JJ) Smith/Lynn Smith) |
2 Contacts w/ diff last names (ex: John (JJ) Smith/Lynn Brown) |
|
(none) |
John Smith |
John & Lynn Smith |
John Smith & Lynn Brown |
|
Dr. |
Dr. John Smith |
Dr. John & Lynn Smith |
Dr. John Smith & Lynn Brown |
|
& Dr. |
John Smith |
John & Dr. Lynn Smith |
John Smith & Dr. Lynn Brown |
|
Mr. & Dr. |
Mr. John Smith |
Mr. & Dr. John Smith |
Mr. John Smith & Dr. Lynn Brown |
Several reports such as mortgage and closing fee coupons; donor acknowledgements; pledge notifications and reminders; and periodic pledge revenue forecasts open additional screens for you to select your report options.
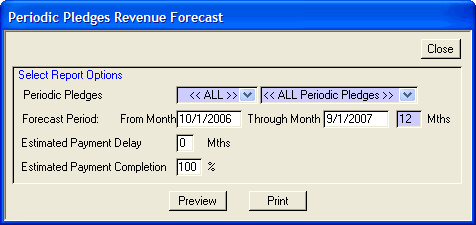
Keystone has many reports, and many of these reports include some options not discussed above, or whose form varies somewhat from the examples discussed.
When reports include several selection options, remember that records will only be included if they meet the criteria of all of the options selected (including any criteria implicit in the report type).